 Why You Can Trust CNET
 How to Remove Wallpaper in an Old or Period House
Wallpaper removal can be a chore, especially in a home with generations of paper and paint. Here's how to save money and do it yourself.


- Shortlisted for British Photography Awards 2022, Commended in Landscape Photographer of the Year 2022
Wood-chip wallpaper is the Devil's work.
Stripping wallpaper can be an absolute headache, particularly if you live in an older property that's got layers of old paper that have solidified over the decades. Previous decoration attempts might have included layers of paint, strong wallpaper adhesive or even the nightmare that is wood-chip wallpaper, which contains flecks of wood to give a mottled effect and as a result can be very difficult to remove.
But there are some good techniques that can make the process easier, including a range of tools, glue-dissolving liquids and fillers to fix up any broken plaster left behind. And I'm confident that they work, having just removed every inch of multiple layers of wood-chip wallpaper from a large room in my 160-year-old house -- and both the house and I lived to tell the tale.
Though you can hire professional decorators to come in and do the work for you, they'll likely charge by the hour, and it can get extremely expensive. Putting in the work yourself is tiring, but it can save you a lot of money.
Here then, are my top tips for removing wallpaper. You can also check out how to build your own pipe shelves and how to make custom poster hangers for just $1.
My room just about survived the process. As did I.
What you need to remove wallpaper
Before you get started, you'll need to pick up a few items:
Wallpaper adhesive dissolver: This liquid soap mixes with warm water (or sometimes doesn't require mixing). When applied liberally to the walls with a large sponge, it helps dissolve those years of wallpaper adhesive, hopefully making things easier to remove.
Wallpaper perforator: For the water and dissolving agent to penetrate the layers of wallpaper, you'll first need to perforate the paper, particularly if the existing wallpaper has been painted and is therefore more resistant to liquids. I used the Zinsser Paper Tiger, which you simply run over the paper, leaving behind lots of tiny holes for the liquid to seep into.
Heavy-duty wallpaper scraper: This involves a relatively dull blade on the end of a strong arm, which you'll use to hack away at the paper. It isn't expensive, but it's worth getting a good one that'll put up with some abuse.
Step ladders: This will depend on the height of your room, of course, but make sure you're able to safely reach the upper parts of your walls.
Dust sheets: If you have carpet down in your room, or a lot of soft furnishings that you can't remove, then dust sheets will help protect everything.
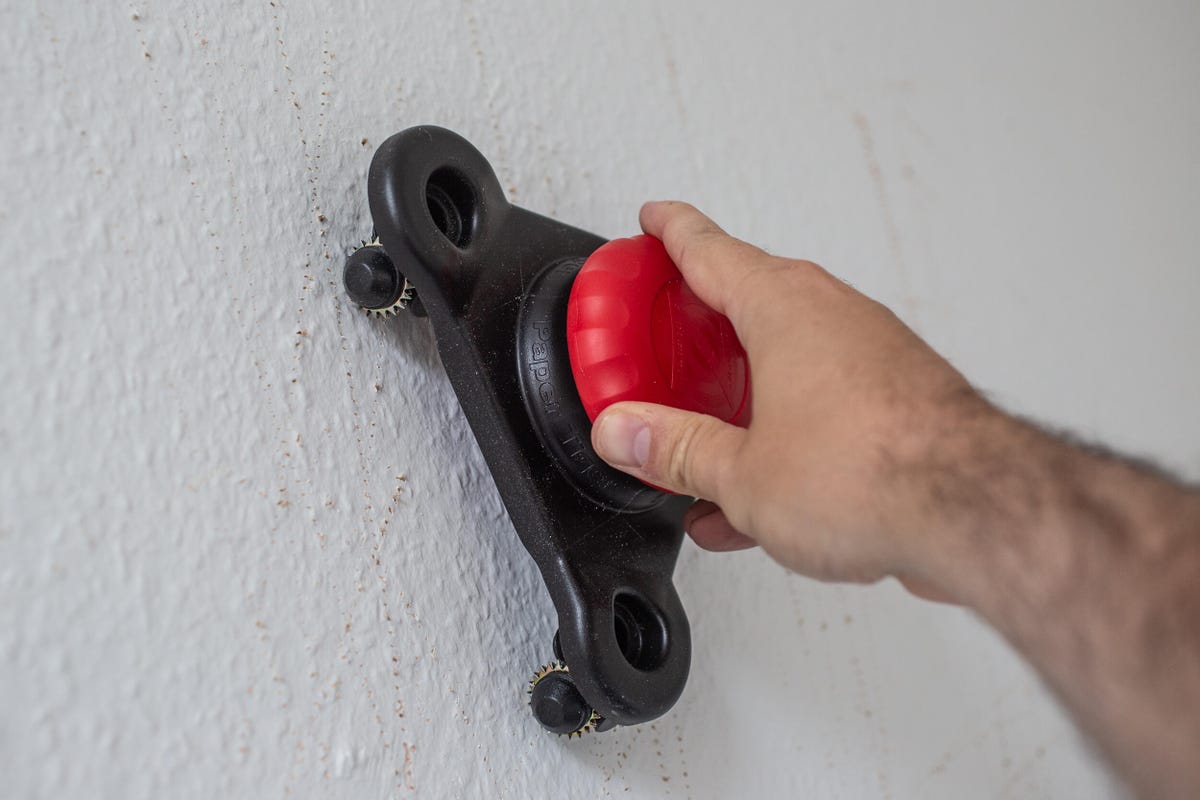
Run the Paper Tiger over your walls and it'll create small holes for the liquid to seep into.
Box cutter knife: Like the perforator, this can help create slits in the wallpaper, but it'll also help you separate painted paper from other areas, like door frames.
Dust masks: Years of dust and debris will start to fill the air when you bring down the paper. Make sure you're protecting your lungs with a suitable mask.
Old clothes: Removing wallpaper is a very messy process. Make sure you're wearing clothes that you don't mind ruining. Failing that, consider getting some decorator's overalls.
Bluetooth speaker: Fine, you don't need to have a speaker, but putting on a great podcast can really help the hours fly by. Almost.
Time: Removing wallpaper is rarely a quick and easy process, especially if you've got an old room with decades and decades of paper, glue and paint on the walls. Even setting aside a weekend isn't likely to cut it, unless there are more than one of you working on the project. Expect it to take multiple evenings of work, and allow more time than you think you'll need, especially if you're hoping to redecorate a spare bedroom before guests arrive. I'm speaking from experience here -- sorry to my friends who had to sleep on the couch.
By shoving everything roughly into the middle of the room I was able to get full access to the walls.
Step 1: Prepare your room
You'll need to remove any pictures from the walls and ideally remove everything you can from the room. If that isn't possible, try to pile everything up in the middle so you have full access to the walls. Cover soft furnishings with a dust sheet and do the same if you have carpets down. I have a vinyl floor in my room, so I wasn't worried about being able to sweep up debris later.
Step 2: Perforate and prepare your walls
To help the liquid wallpaper remover penetrate the years of paper, run a perforator over the surface to create lots of holes. I had to be fairly brutal, as there were multiple layers of glossy, hardened paint over the top of the wood-chip wallpaper, so I knew I needed to go quite deep with the holes if I wanted the liquid to soak in. You can also use a box cutter to create surface slashes for the liquid, which will also give you a helpful starting point to insert your removal tool later.
Get a bucket and fill it up halfway with warm water. Add your wallpaper removal solution (as per its instructions) and using either a large car sponge or even a clean wool or foam paint roller, liberally apply the solution to your perforated walls. Give it five minutes and then reapply, especially if you've got layers of paper to remove. Do this in sections, rather than attempting to soak the whole room in one go.
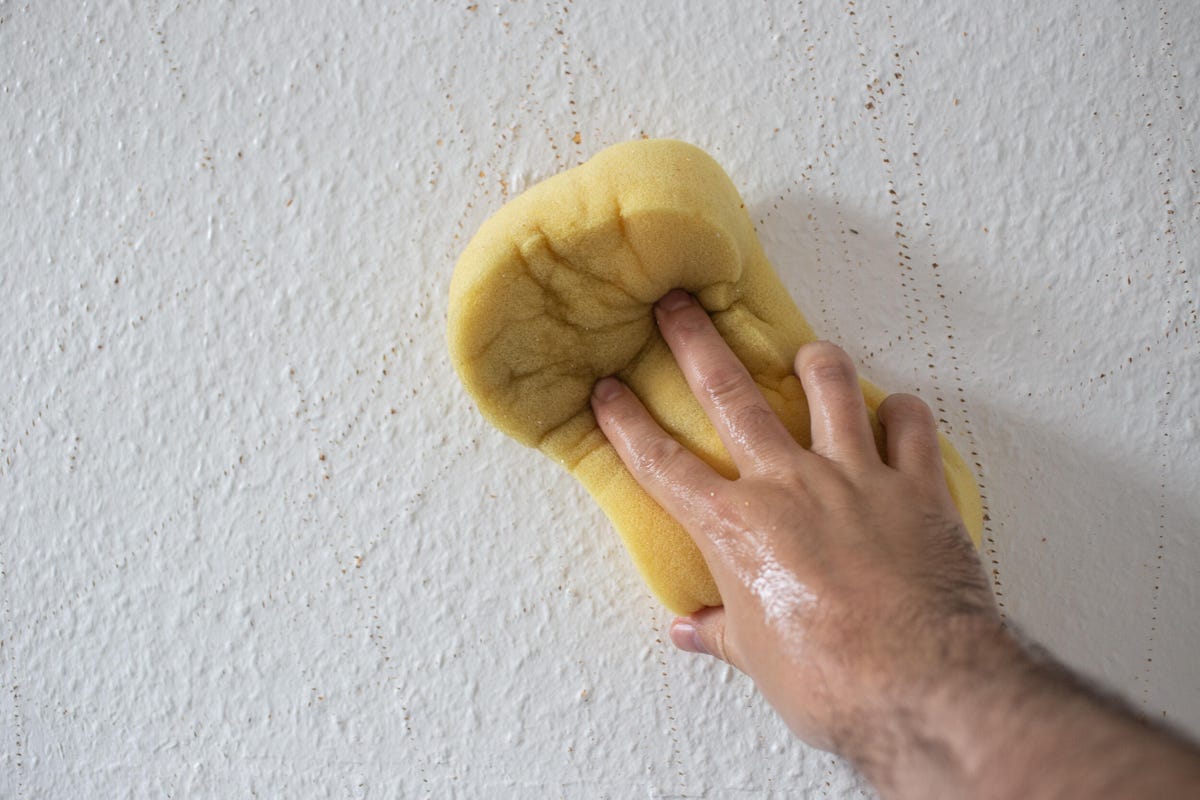
Use a large sponge or clean paint roller to get the warm water solution onto your perforated walls.
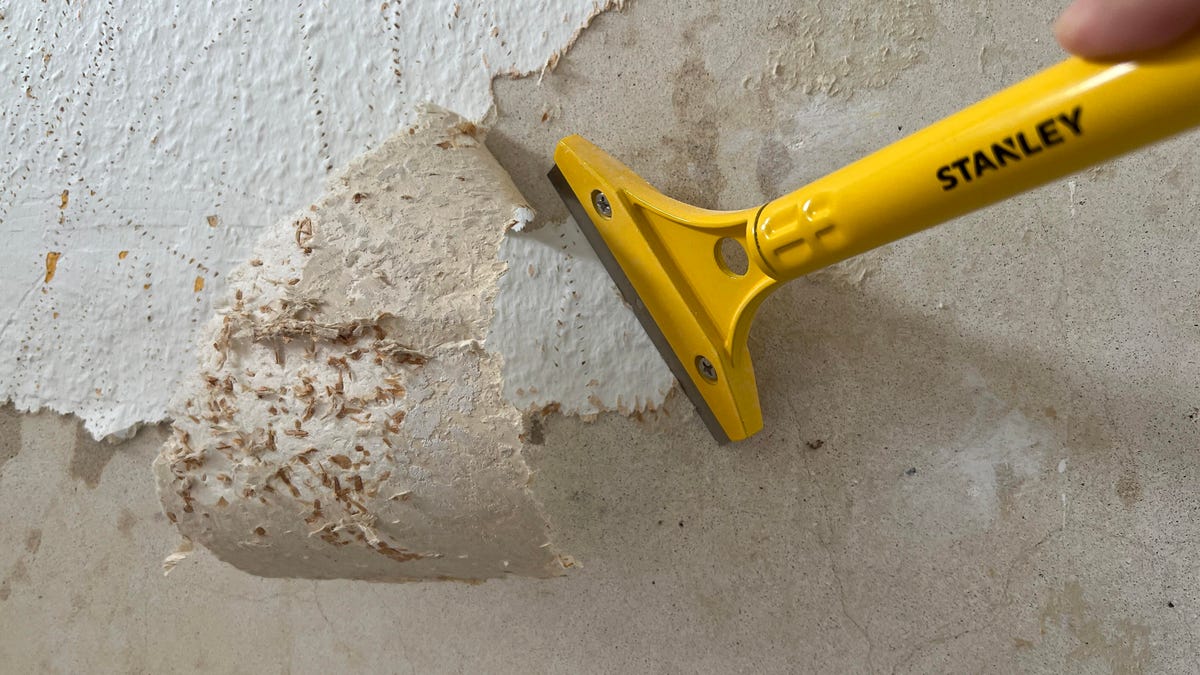
Step 3: Get in there with your scraper
Once your paper is soaked, it's time to get stuck in with the actual removal. If you've made slits in the paper with the box cutter, position the edge of the scraper into a slit and start to push through, using a sharp angle against the wall. Be prepared that the paper is unlikely to come off easily; you'll probably need to apply force and make some quite violent shoving motions with the scraper to get bits to come off.
Be careful, though, not to be too rough and to avoid stabbing too hard into the wall itself -- you could damage the underlying plaster, which you'll need to repair later before painting or repapering. You may need to reapply the solution, especially if you find that some upper layers of paper come off, leaving dry, older layers beneath.
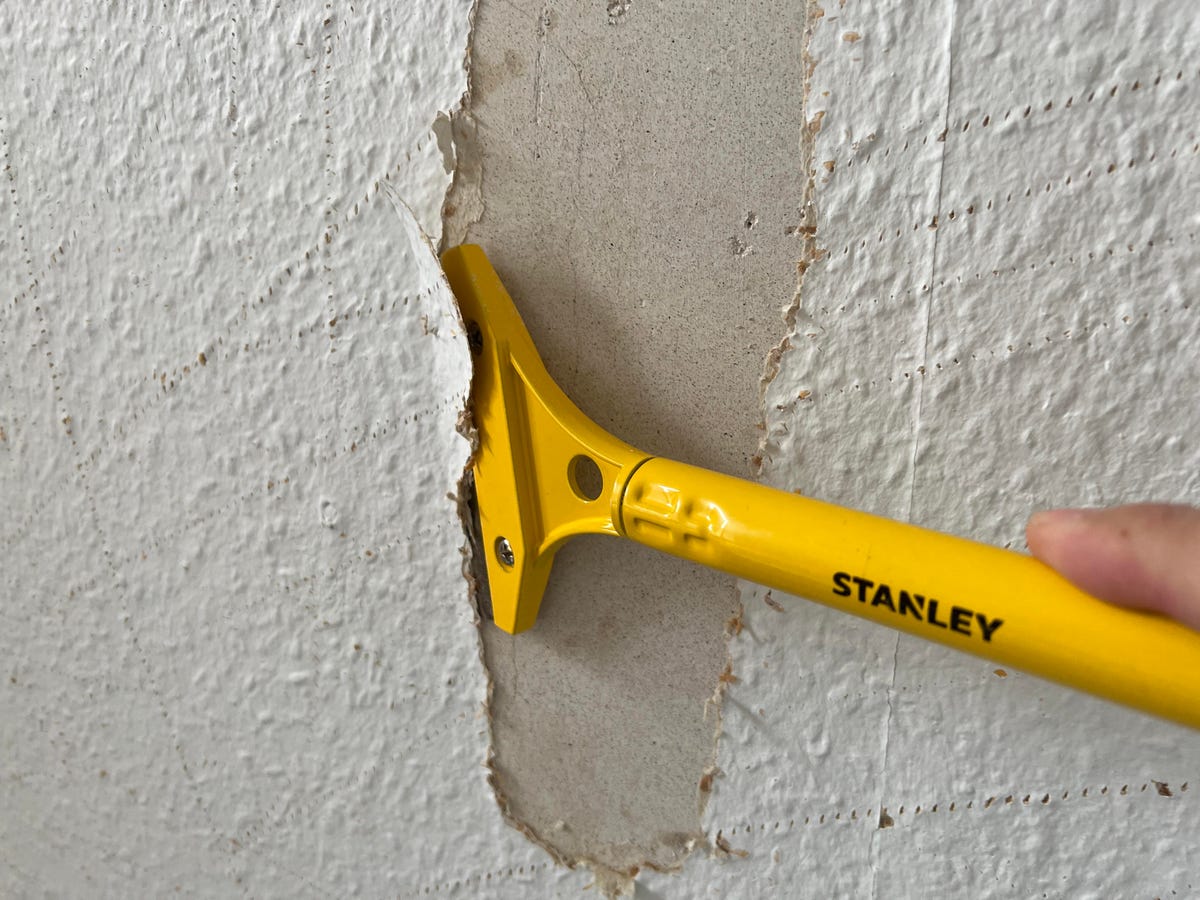
Find -- or make -- a gap and get in there with your scraper.
Work in sections, applying the solution, letting it soak in and then hacking away with the scraper. Some areas might come off more easily, whereas others will force you to work an inch at a time. I won't lie, it's a long and tiring process, and I found I had to take regular breaks.
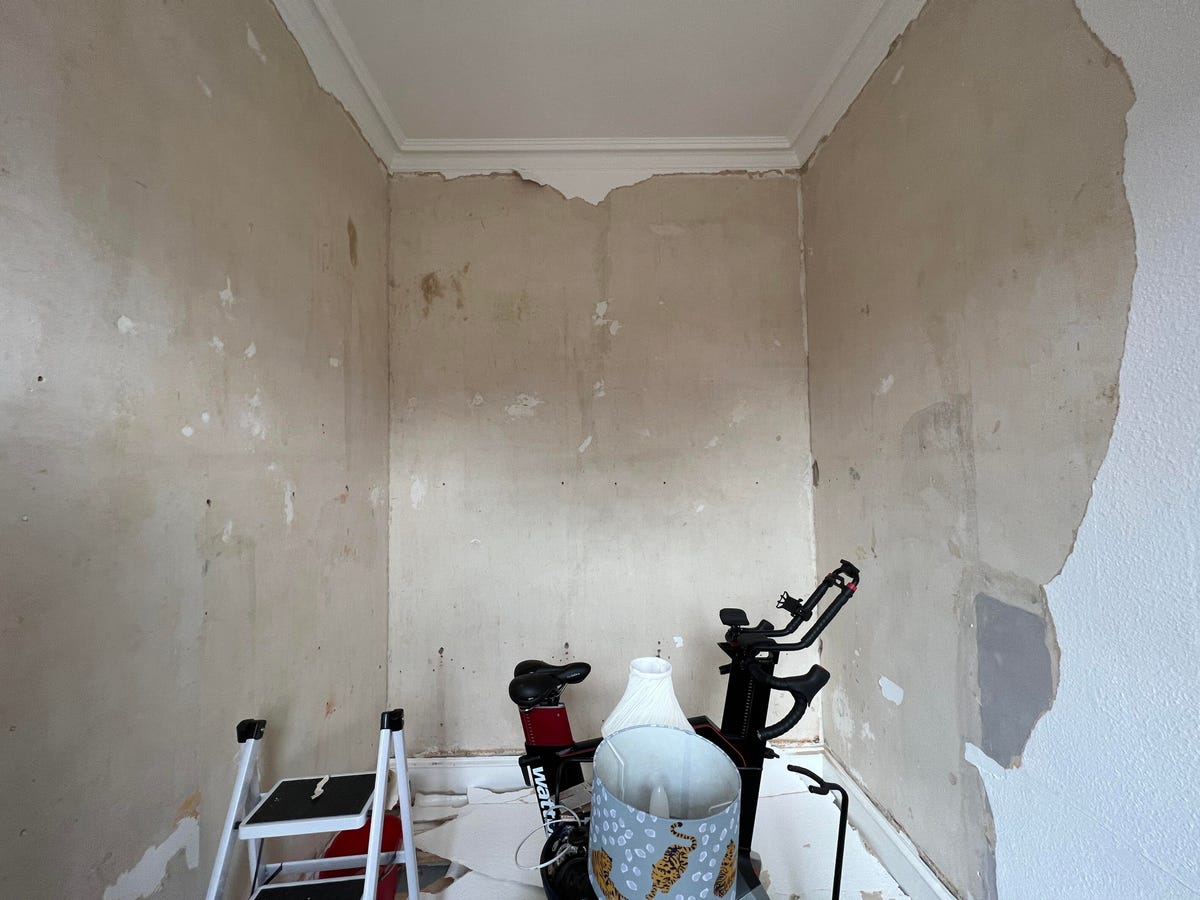
Depending on the age of your property it's likely you'll find issues with some of the underlying plaster. In my room, whole chunks of it came off in some places, exposing the brickwork underneath. Don't worry about this too much -- it happens, and it can all be fixed later.
Step 4: Cut neat lines with the box cutter
My wallpaper had been painted many times, with the final white top coat blending seamlessly with the wooden door frame and the original Victorian cornicing. I found I needed to use the blade of the box cutter to create a line of separation, allowing the paper to be removed from the wall, without the paint pulling up on areas I didn't want it to.
I have no doubt a professional would've done a much better job here -- or even suggested removing the paint from the door frames altogether, but it looked good to my eye at least.
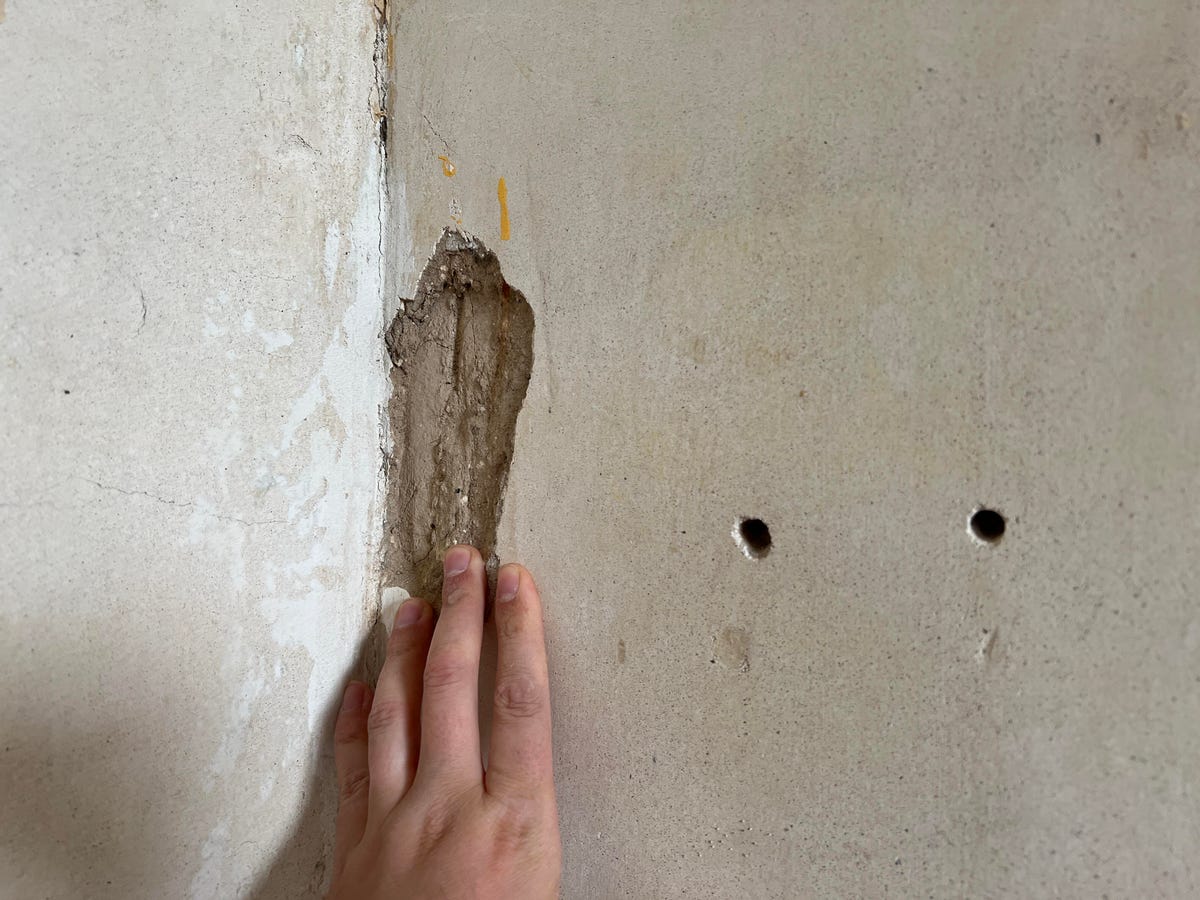
I uncovered various holes and had some large chunks of old plaster fall out.
Step 5: Fix up and prepare your walls for decorating
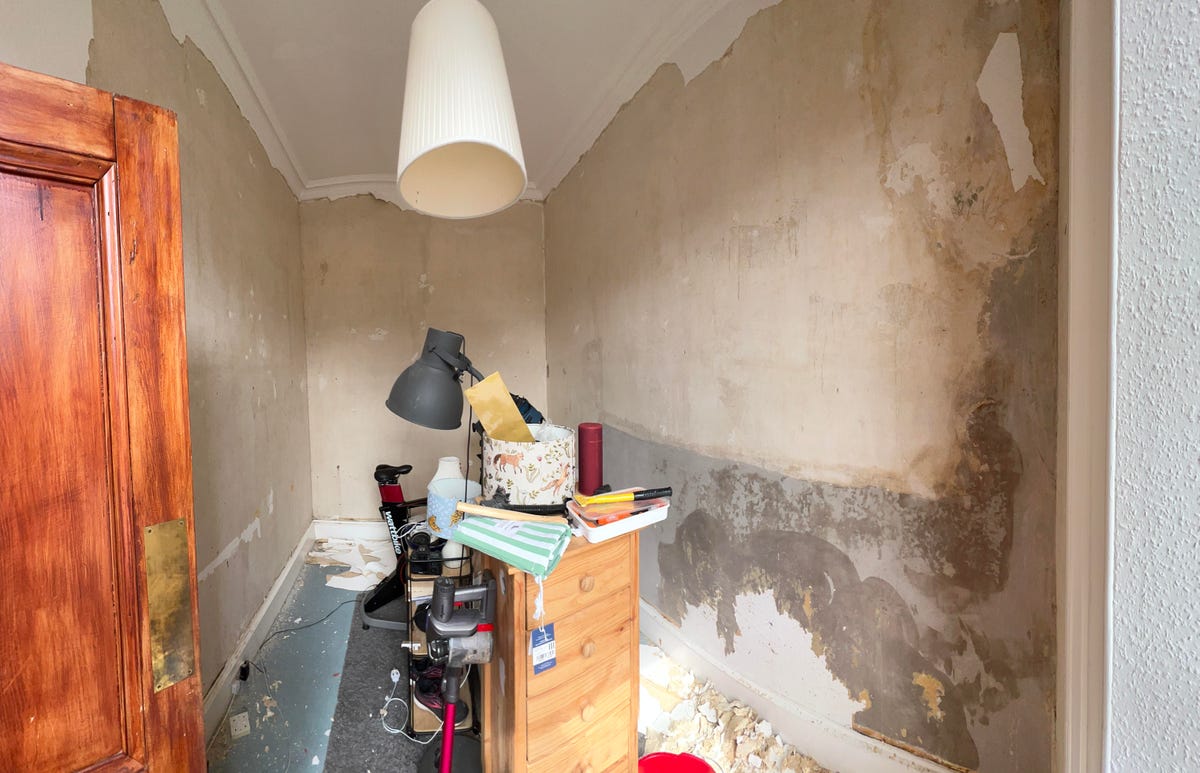
Once all the paper is removed, you can assess the damage. In my case there were sizable chunks of plaster that came down that had clearly deteriorated over the years beneath the paper. There were also many holes from drilling and inserting wall plugs, all of which needed fixing to create a smooth wall that could be painted.
I used a ready-mixed interior filler and a couple of small joint knives to apply filler to the smaller holes and simply scrape the excess off over the surface. For larger patches of broken plaster, I began by brushing away any excess material and dust before applying a larger amount of filler and smoothing over as best as I could until it was pretty much level with the surrounding wall.
Once these sections were dried (usually in about 4-6 hours), I used an orbital hand sander with 120-grit sandpaper to sand down the rough parts of the filler so it was smooth and perfectly aligned against the wall. This creates clouds of plaster dust that'll settle over everything in the room. Close any doors, and make sure you have dust sheets down. It's crucial here that you also wear a good dust mask at all times when you're in the room.

I used filler to fill the holes and then sanded it smooth once it had dried.
Like the paper removal, this is a time-consuming process, but it's worth putting in the extra hours here. The better the finish you can get on your base walls, the better your paint or paper will look over the top.
Step 6: Decorate as desired, have a cup of tea
Once your walls are finished and prepared, you can simply decorate however you want, whether that's simply a base of primer and then a coat of paint (as I'm doing), or new paper that you can worry about removing again in years to come.
Once you're done, make yourself a well-earned cup of tea and admire your handiwork. Maybe have a biscuit, too. Go on, you deserve it.
Looking for more DIY projects? Check out cheap and easy ways to make your new house feel like home and how to set up a smart garden.